Showing posts with label 4K. Show all posts

Thursday, April 18, 2013

THE MAKING OF 'SHARP'

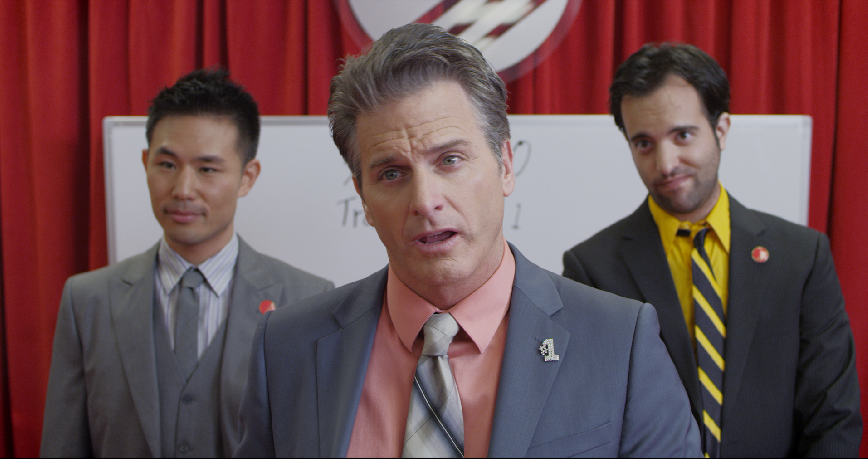
I recently teamed up with director Nicholas Conedera and producer Jack Hooker to shoot the feature film, 'Sharp' (http://sharp-themovie.com/) Sharp is a coming of age dramady that doesn't take itself too seriously. It's funny and entertaining, but still poignant and moving. Terrance Withrow (Played by Nick Nigro), a lazy, stoned-out surfer must adapt to the corporate world and learn how to sell cutlery in order to support his family and get his parents back together after his dad loses his job and walks out on the family. 


We had a very healthy 4 week prep time for pre production and Nick and I spent the better part of 2 of those weeks combing through the script scene by scene, tailoring a very detailed shot list for storyboards. This was critical to our success in making all our days on our incredibly tight 22 day shooting schedule with an average of 5 pages/day. 


Our camera package was provided through Panavision Hollywood, comprised of a Red Epic-M and Ultra Speed set. We shot red code 5:1 compression at 4K and cropped for 1.85. 5K was considered but I ultimately decided against it so I'd have my true focal lengths and I knew we were going to stay on the wider end of things and the 17.5 vignettes quite a bit with the up-res. 


We rated the camera at 800ASA and used IR NDs on our exteriors to drop us down to a T4/5.6. I used 1/4 and 1/2 coral filters on the exteriors to really accentuate the Southern California look (the film takes place in San Diego).


I used a rota pola occasionally and used ND SE horz grads on exteriors to knock down the sky occasionally. 


There two very distinct looks in this film; the Sharpco world which is heavily influenced by Wes Anderson and Pop Art. We came up with a manifesto of sorts for these two worlds. 


Sharpco: 
-- Deeper depth of field (T4/5.6)
-- Symmetrical compositions 
-- One-point perspective 
-- Precise movement
-- Camera only moves on X,Y, and Z axis (no diagonals) 


-- Bold, saturate colors, especially red in the production design
-- More head room 
-- Wider Lenses (nothing tighter than a 35mm) 
-- No diffusion in front of the lens 


For Terrance's home world, we decided to keep things as grounded in reality as possible.

Terrance: 
-- Shallow depth of field (T2+)
-- Asymmetrical diagonals  
-- Camera is always handheld, loose, and responsive
-- Organic shapes, and earth tones in the production design


-- Cooler hues  
-- Color temp mixing 
-- Tighter headroom 
-- Hollywood black magic 1/2 and 1/4

As the film progresses these two worlds begin to mesh together in Act II and III and we experimented with mixing styles. 
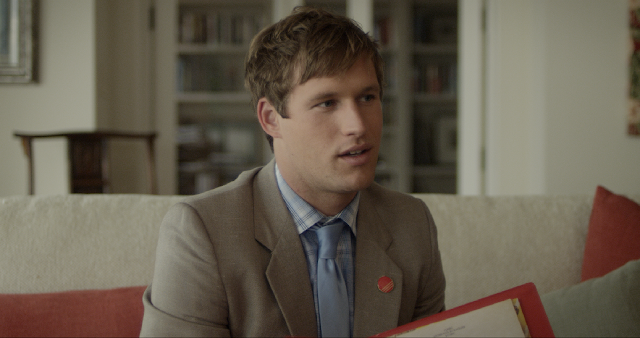


We rarely used a lens tighter than a 50mm and stayed mostly lensed the actors with 24, 29, and 35mm focal lengths. 


Throughout the film we get deeper and deeper inside Terrance's head and visit his dreams. This was my first time filming underwater and it was a blast despite all the obstacles we had to overcome. We shot all the underwater material over a weekend in Zuma beach area using Hydroflex's Deep Water Epic Rig. 


We had to add 2 extension bellows to the rig to accomodate the very large and heavy 17.5mm Ultra Speed (9lbs). This brought the total weight of the rig to 60lbs which became quite the challenge to get the camera completely out of the water past the shallows. We filmed all the underwater at 120fps at 4K. 


The director and I went out with our actors into the 55 degree water with nothing more than the rig, 3mm wetsuits, booties, flippers, and mask. None of us were scuba certified but luckily I'm competitive swimmer and can hold my breath for up to 3 minutes and the director is a surfer so we were able to manage quite well out there despite purple lips and numb fingers. I had to be very conscious with my trigger finger because 120fps at 4K gobbles up media! My 1st AC Adam Corriea was a huge help for all the underwork. 


Terrance's home is a chaotic, crumbling space so I wanted to go incredibly minimalistic with the lighting and keep things moody and atmospheric.


I wanted it to be cozy and familiar. The location we used is actually the director's house so it was really nice to spend as much time as we did during preproduction at the location, allowing me to see the different looks of the natural lighting throughout the day. We scheduled our scenes based off my notes for the most optimal times to shoot in each room. 


For the dinner scene my wonderful gaffer Eric Corriea built a covered wagon with (6) 75w bulbs, dimmed to about 40%, skirted, and diffused with Full Grid. We put all of the living room practicals on dimmers and motivated them with a 650w fresnel with XXS chimeras and multiple layers of diffusion, providing a backlight for Hunter.


I used a dimmed red head in the kitchen bounced into 4x4 bead board for a little background ambience. 


The nice thing about shooting in the director's house is he let us screw in wherever we wanted to save time rigging speed rail, a rare luxury for location work. My Key Grip Jordan Black was very pleased. This allowed us to shoot 360, allowing the actors to loosen and improvise which Nick liked to do often. 


Dalton's trailer proved to be a very fun challenge because of the very cramped quarters. We lit the scene entirely practically using peanut bulbs for the bottle lights, a 100w photoflood in the green shaded fixture on the table and hid various wattage bulbs around the space to create depth.


We color graded at my house using Da Vinci Resolve, finishing in 2K. 'Sharp' premiers on April 27th at 2PM at the Downtown Independent in downtown Los Angeles. The address is 251 S Main St, Los Angeles. If you'd like to attend you can buy tickets here: http://www.sharpthemovie.eventbrite.com/


Friday, March 22, 2013

THE MAKING OF 'ISSUES'

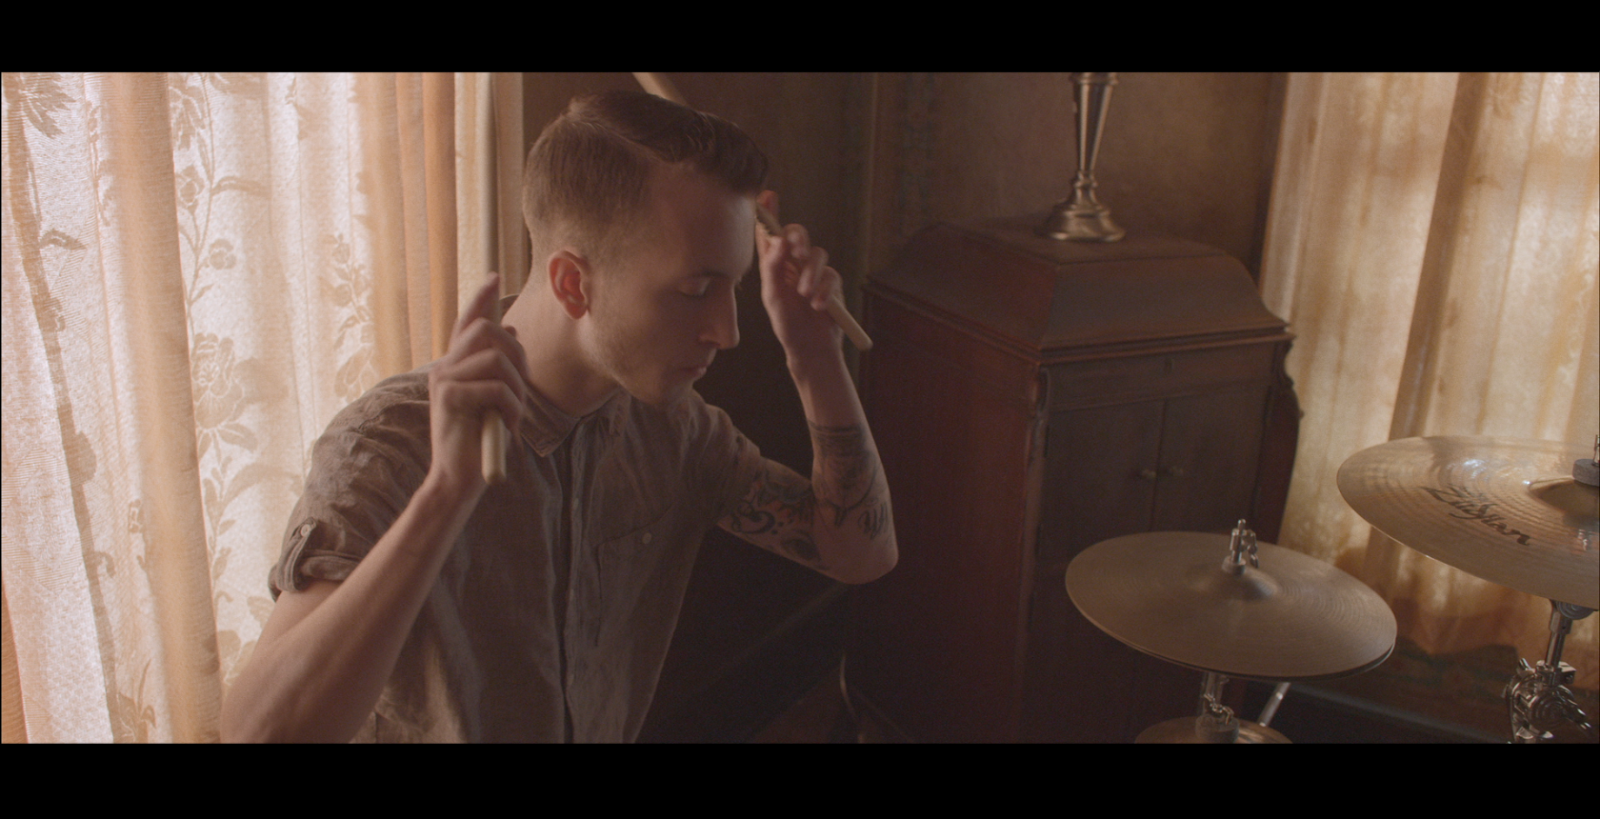
I recently wrapped my first metalcore video with director Dillon Novak (http://montaukfilm.com/) of RSM. The video ping pongs between performance and narrative, examining a cycle of multi-generational domestic violence. The narrative is broken up into two segments; the character as a child and as an adult. We opted to shoot with longer lenses with slow motion for a more observational aesthetic for the flashback scenes with the child.


We kept the camera at a low angle to match the child's eye-height for POVs and dirtied up the field of view as much as possible with foreground elements (mirrors, windows, curtains, etc.) to evoke a sense of fragmented memory.


We used heavier diffusion in front of the lens using 1/2 and 1 strength black magics to aid this dream-like effect. Really love these guys for digital because they take the edge of the highlights in an organic way, blossoming without effecting the contrast.


For the present day scenes, we threw away the diffusion and used wider lenses in the 29-35mm range for CUs for a more immediate intimacy, mixing handheld with fluid slider movement.We used a 8' dana dolly which is by far the smoothest ride for a slider that I've come across. Super buttery.


For both the flashback and present day scenes we used a lens baby for our insert shots to draw a subtle visual parallel between the child and his adult-self.


Although it was a bright sunny day on our production day, we wanted a more melancholy overcast look. We used overheads when we were dealing with direct sun and shot all of our day/ext work during magic hour. I wanted to unify the performance and the narrative with a "creamy", atmospheric, and soft image. I wanted high contrast lighting, but I still wanted to dig into the shadows and pull out as much detail as possible in the toe.


For the performance I wanted slightly harder light to compliment the soft lighting of the narrative scenes. We used a 45 & 90 degree shutter angle and opted for a responsive, dynamic handheld look for the camera movement. We really diverged from the narrative style, embracing shaky-cam, but using it sparingly to create energy bouncing off the 120fps material.


We had M18s coming through the curtains for a 3/4 back and keyed with a jokerbug inside with a chimera and 4x4 frame of 1/2 grid. I had the camera set at 4300K to create a color contrast between the cool daylight and the warm, amber practicals and curtains. My gaffer, Silvestre Rios spiked me with lens flare with a shuttered down source 4 to ping from just off-camera.


Panavision Hollywood provided us with a Red Epic package with an ultra speed prime set which included 14, 17.5, 21, 29, 35, 50, 75, and 125mm lenses. We shot the video at 5K and I colored the footage with Dillon in Da Vinci Resolve.

You can watch the video here: 


Monday, March 18, 2013

Making of 'Tear'

I recently collaborated on an impromptu short set to Amon Tobin's 'Angels & Deamons' with director Elliott Sellers (http://www.elliottsellers.com). This was a total creative exercise because we literally put the video together in less than 24 hours. Elliott came up with the concept and I quickly suggested we check out one of my favorite locations to see the sunset in LA, in a hidden spot tucked on the westward side of Griffith Park.


Elliott called two of his acting friends Katie Bunn & Dontez Hood, we hand-picked some fabric and an umbrella and we jetted off for the sunset, a skeleton crew of a Elliott, Myself, and a producer friend from New York, Chavvah Stuart (http://chavvahstuart.com/), who was able to tag along and help us while filling her delayed flight's hours with some sunshine.


I think the title of the song is a bit self-explanatory for the concept of the video. We wanted to play with traditional, Western-genre stereotypes in wardrobe, clothing the angel in black and the demon in white.


We used a Panavised Red Epic with Kowa spherical primes shooting at 2K WS to crank the camera up to 300fps. The Kowas are one of my favorite sets of lenses and we made sure to showoff the wonderfully organic lens flares.


If you hit the 20mm just right you create perfect swirling, amber circles in the middle of the frame. They are the sister set of lenses to the spherical Baltars, which render warmer skin tones with cool flares.


I'm going to guess we shot nearly 80% of the video on the 20mm bc we wanted to be as wide as possible for our very wide 3.0 aspect ratio and crop factor shooting at 2K to accomodate for 300fps. When we needed a true wide we would switch to 4K at 120fps.


We weren't able to utilize the sensor's 5K capabilities because the lenses were made in the 50's and can only accomodate for a s35 format. We maintained a very shallow depth of field by keeping the camera close and shooting wide open at 2.3. We used very little filtration only using ND, a polarizer, and a sunset SE grad for our wides.

You can watch the video here! Enjoy!


Tuesday, September 18, 2012

'DANCING IN MY HEAD'


I recently had the pleasure of shooting the music video for Eric Turner vs Avicii's 'Dancing in My Head' with director, Chris Marrs Piliero. Conceptually this was a very dark & twisted yet comical narrative piece that explored the intoxicating effect of 'the one that got away'.


The piece opens with a night club scene where The Guy meets The Girl and sees the girl of his dreams but can't find the courage to say anything to her. I wanted to keep the lighting subdued, sexy, and fun. My gaffer Matt Ardine did a fantastic job in executing our plan of integrating the lighting into the set, using LED lite ribbon, Par 20's, LED color blast 12's, and party red kino tubes for the architectural lighting. This was not actually an existing club! This was the handy work of our production designer Alex Delgado, who transformed a spacious living room into our club location, saving us a company move! This was my first experience using Lite Ribbon and it was incredibly versatile and useful; small, lightweight, and easy to put just about anywhere. 

We used a 1x1 LED light panel bounced into a 2x2 pizza box for our key light at the bar and used a 26 degree leko with a dappled light gobo as a special backlight for The Girl to give her a bit of mystery and really "pop" from the rest of the scene. 


We shot the video on the Red Epic and I was very impressed at how the camera was able to hold detail in the shadows in this scene. The camera was rated at 1280 and we shot the scene at a T2. 

After The Guy misses on his window of opportunity, he is tormented by the memory of this girl as he tries to go about his everyday life. Our schedule was super tight and although I wanted to shoot all the driving material later in the day, we were forced to shoot all the driving during mid-day with lighting that was not optimal. For his driving coverage we picked streets where the lighting was best - opting for backlight, keeping the background buildings dark. We didn't have the budget for a process trailer so we kept things simple using rags of unbleached muslin, taping large strips just out of frame so we could bounce a little light back into his face. 

For our day exteriors we had such an ambitious shot list that the only "lighting" we really did was with a 4x4 bounce (soft side), negative fill, and a 4x4 frame of opal when we got tight for closeups and the sun was just a bit too harsh. 

The guy ultimately can't get this girl out of his head so he decides to take drastic measures and perform a little self-surgery, literally removing his brain. To light the garage I kept things very simple. The scene takes place during the day but I wanted to keep things very dark and moody, so I had to delicately balance the amount of suggested daylight with the practical light that I wanted to key the scene with. To create this effect we blacked out all of the windows except for 1 small 1x1 window near the top of the stairs, where we placed a Par 64 gelled with 1/2 CTB to create a shaft of daylight. We used recessed light ribbon to toplight the tool bench and used a 60w photoflood in the practical work lamp which we bounced into a 2x2 pizza box to key The Guy. I always wanted a hint of suggested daylight in frame, so when we turned around for The Guy's coverage, we used an apple box to prop the garage door slightly open to let a little ambient spill kiss the background. 

This is an incredibly graphic and disturbing scene and to add to the comedy, we decided to keep the camera movement romantic and intimate, creating a disturbingly, ironic tone. 

Toward the end of the video, The Guy removes his brain and chucks it into a river. Finally free from the burden of his own mind, he resumes daily life and goes grocery shopping only to be confronted by his Brain in isle 4. When we did our tech scout, the grocery store location had a chaotic mix of different bulbs already installed; cool whites, warm whites, and off-brand daylight balanced tubes … the whole gamut. Instead of  going trough the tedious and time-consuming process of swapping all the tubes to make them all uniform, we used naked image 80's to key the scene using the same ratio of cool whites and warm whites and 56K bulbs. 

This video was fairly VFX heavy and we had to shoot three passes for each setup when both The Guy and The Brain were in frame together; one with Jesse, the brain, and the puppeteers, one with just the brain and the puppeteers, and one clean plate. The puppeteers did an incredible job and I was so pleased we were able to do almost all the effect work practically. 


That's about it! Hope you enjoy the video! 


Friday, July 13, 2012

A DAY WITH THE SONY F65


     This week I had the pleasure of testing the Sony F65 workflow at Sony Studios through their free (yes, free) workshop at the brand new DMPC (Digital Motion Picture Center). I shot an int/night scene using a Sony F65 with a Fujinon 18-85 T2 zoom and Leica S Primes. 

     This camera is an absolute game changer and Sony has set a new standard for digital cinema. This is the first and only true 4K camera on the market and we were able to see the entire process from initial capture to projection thanks to Sony's DMPC 4K workflow system and Fuji's new onset color grading system, the CC Box. 

     I rarely like talking about cameras and am much more lighting oriented, but this camera is certainly worth talking about because it's the first digital camera I've come across that is capable of doing things that film negative cannot. 

     TEST Int/Night: I wanted to push this sensor's toe to the maximum so I lit a scene almost entirely using practical sources: (4) wall sconces, (4) table lamps w/ 60w bulbs, and (1) 2x2' neon sign of a Geisha. The only non-practical light I used was several BJs out the windows with 1/2CTB to illuminate the curtains for a subdued moonlight. We shot the scene at a 2.8/4 split at 800IE ... Yeah, a 2.8/4, the camera is THAT sensitive! My focus puller was very pleased! We shot a wide of a woman walking from one side of the room to the other, ending on her final mark, sitting on top of a desk in front of the neon sign. As she walks through the room she stays 2 under until she reaches the neon sign where she is over 1 stop. We did another take at 60fps and intentionally underexposed 1 full stop. Literally, all of the detail is there. We could see detail that I couldn't see with my naked eye; the fireplace and the corners of the room that were reading 4 and 5 under on my spot meter, still had information. This camera handles low-light situations better than any camera i've seen and has a very pleasing fall-off to true black similar to 35mm ... Between this camera and lighting fixtures shifting toward energy-efficient LED & plasma, you're certainly going to make your producers happy with lower lighting costs. 

     Resolution: The resolution of this camera is unparalleled and once the anamorphic desqeeze firmware update is released (August), this will be my first choice for shooting anamorphic. Sampling from an 8K sensor, the F65 has a 2880 green pixel count (the green pixels carry resolution) where the Red Epic has 2048 and the Alexa has 1440. We projected in 4K and the detail you can see with this camera is unbelievable. A popular argument of late in response to high-res sensors is the need to throw old glass on the camera or diffusion filters in front of the lens because the resolution is too great but Curtis Clark ASC screened his short film 'Eldorado' with naked Leica Primes (which are incredibly sharp) and the results were astounding. His leading lady looked absolutely stunning ... proving that through good makeup and attentive lighting, you don't need to soften the image for women. On the contrary, she was even more striking than if they had thrown pro-mists or used Cookes because her features were powder soft juxtaposed to the incredible detail of her hair and the textures of her dress. She really popped! Day/exts were filmed outside Las Vegas at a T8 and the scope & detail was akin to IMAX. The F65 has a base sensitivity of 800IE and we pushed the camera up to 1600IE and there was little to no noise when projected 4K. The noise is very similar to film grain and dances in an organic and random nature that is quite pleasing. 

     Frame Rates: I'm going to hate on RED a little bit here because the windowing at higher frame rates drives me bonkers. One of my favorite features of the F65 is that there is no windowing when you want to do higher frame rates (currently does 60fps, 120fps coming soon). When you do want to do framerates higher than 60fps however, you have to switch from a mechanical shutter (another HUGE benefit of the camera, which I'll get to in a bit) to an electronic shutter.detecable, even with quick panning

     Shutter: The mechanical shutter is a brilliant antidote for the plague of "jello and moire effects" and "aliasing" that has been infamously associated with CMOS sensors. The F65 uses a CMOS sensor just like DSLRs but because of the mechanical shutter you no longer have the problems associated with image scanning. We shot close-ups of fabrics and there was absolutely no aliasing or moire effects; just clean, crystal-clear detail. We also tested the mechanical vs the electronic shutter and there was almost no difference between the to as long as you don't whip pan. 

     Dynamic Range: This is by far the most impressive aspect of this camera. With 14 stops of latitude shooting S-log-2 with 6 stops in the curve at it's native 800IE  (7 stops at 1600IE), you're able to overexpose the scene as you would with film for a denser image. The camera's sensor is actually set at 39% as apposed to middle grey, allowing for 60% of the information to lay in the highlights. A wonderful feature on the camera is the #3 assigned button which allows you to do a high/low check to ensure that all the information in your highlights and shadows are there. Great confidence check! The latitude of this camera gives your colorist optimal room to play with contrast, power window, and the like. 

     Color Gamut: OK, this was also pretty nifty. The color space of the F65 has the widest color space of any digital camera and wider than any of the modern kodak or fuji stocks. This also is a HUGE plus if you plan on finishing in LUSTRE, Da Vinci, Scratch, or any other color software you might use. The color space is fully integrated into the Academy's newly proposed "ACES" (Academy Color Encoding Specifications) workflow which has 26 stops of latitude and a wider color space than the human eye can see. The idea behind this is that it will be a future proof system that will accommodate for any camera to come out in the future. Pretty brilliant!

     Viewfinder: Best viewfinder I've ever used on a digital camera. I suggested they consider releasing a model with an optical viewfinder but to be honest, I wouldn't be terribly bummed if they didn't because this is the first EVF I've looked through where I can really, and I mean reallllly check the focus while operating. The native aspect ratio marker is 1.90. There are a bunch of presets with the whole range from 1.33 to 2.39 but also has a "custom marker" and you can make any size you can think of. They took note from the complaints of the F35's lines being too thick and bright so they've made the lines thinner and there is a brightness adjustment as well. 

     Built in NDs: You have a range from N.9 to 1.8. Great for narrative and even better for documentary. There is a built in IR filter BUT if you do wish to add even more ND in front of the lens, you MUST use IR ND or else your image is going to suffer. 

     Output Formats: You can record 16bit linear RAW SQ (3:1 compression) which gobbles up around 2.0 GB@24fps. BUT, the latest feature is the brand new RAW LITE which eats around half as much space with only a 6:1 compression. We screened both in 4K and you can barely see any difference. This is fantastic for documentary especially considering you can record onto 1T SR cards (the cheapest form of recording memory) and transfer faster than the Alexa. You have the option of using the old S-log 1 but I would definitely go with the update S-log 2 because the 1 is around 1000% on the curve, where the 2 is around 1400%. 

     Salvage Mode: This was pretty nifty. If you accidentally kick the power out from the camera or if hair plugged in too many hair dryers there is a salvage option that will pop up when you reboot the camera. You can either salvage the footage in camera (takes anywhere from 3 minutes to an hour) or take the safer route of salvaging at your download station using Sony's free software (available online). 


     Weight & Ergonomics: Don't let the pictures deceive you. It looks beefy but it's actually quite compact at 11 lbs. You can detach the recorder from the back which will work up to 5m away making it perfectly suitable for steadicam. If you leave the recorder on, it nicely balances the camera for handheld and is very comfortable. 

     SDi outputs: Unfortuantely both of these signals are identical. There was a lot of talk of potentially changing this and allowing to separate the signals because sometimes you want the DIT to see something different than what video village is watching ... 

     The only Con: No timelapse? They're thinking of changing this but to be honest it's much better to shoot at 24fps and remove the frames you want later (gives you far more flexibility in post). It would still be a nice feature to have though ... 

Overall: This is the best digital camera on the market if you can afford it. 


Nicholas Wiesnet, July 12th 2012